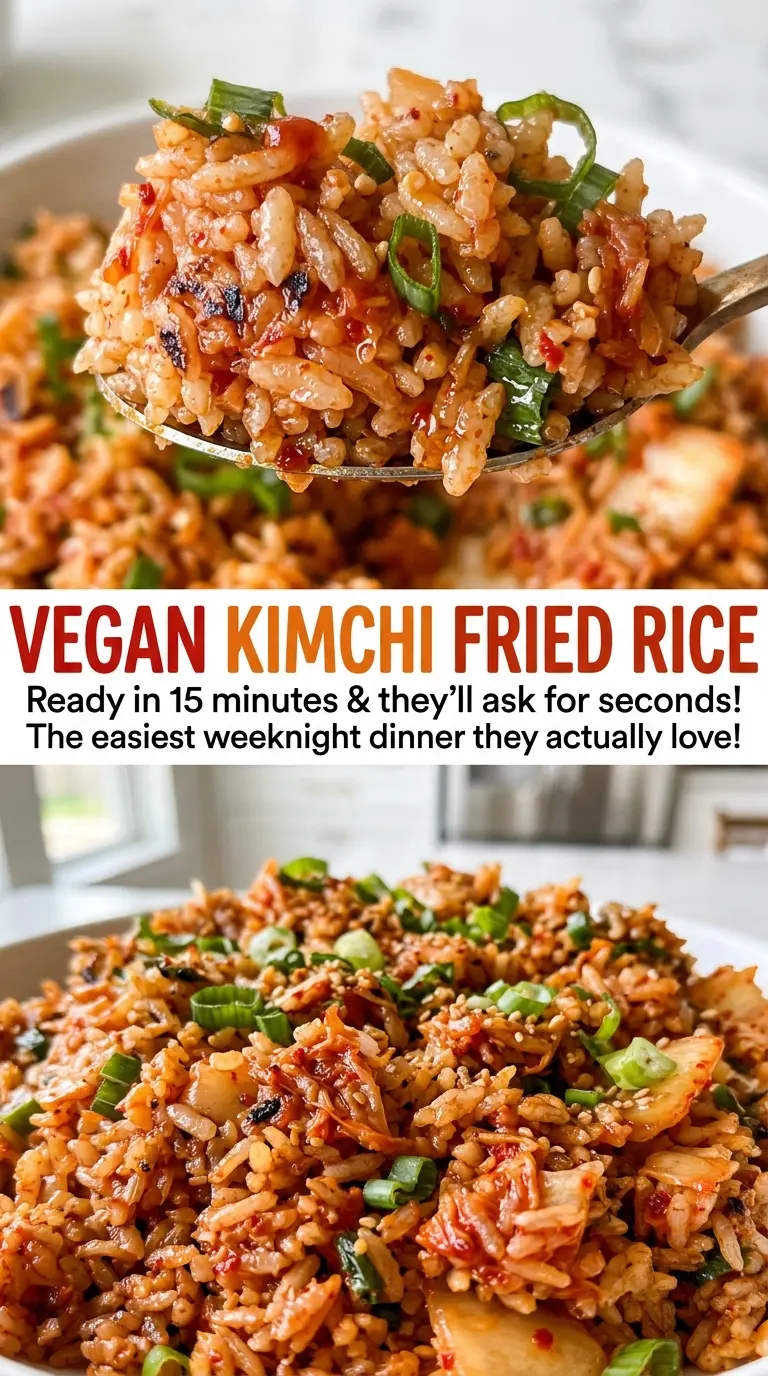
The kimchi hits the hot skillet and releases a sharp, savory smell before the rice ever goes in. I give it a few minutes with the garlic, stirring as the moisture cooks away; that short pause keeps the finished Vegan Kimchi Fried Rice from turning damp and heavy.
Cold rice makes the other big difference. Separate the grains before they meet the skillet, then let them sit in an even layer long enough to pick up a little color instead of stirring constantly. The gochujang and soy sauce coat each grain, while scallion greens and toasted sesame oil bring a fresh, nutty finish. The result is spicy, tangy rice with distinct grains and a little crispness at the edges.

Kitchen Note
Keep the scallion whites and greens separate. The whites soften with the onion, but stirring the greens in after the pan comes off the heat keeps their fresh bite and color.
Save this Vegan Kimchi Fried Rice for a fast, savory meal with tangy kimchi, spicy gochujang, and crisp-edged rice.
Why the Kimchi Needs a Few Minutes Before the Rice Goes In
Kimchi brings plenty of flavor, but it also brings moisture. If it goes straight from the jar into the rice, that liquid can collect around the grains and soften them before they have a chance to fry. Cooking the kimchi with the onion and garlic first gives the liquid time to evaporate and concentrates its tangy, fermented taste.
That’s why the skillet should be hot and the kimchi should be stirred for the full cooking window before you add the rice. You’re looking for fragrant kimchi with less visible moisture in the pan, not browned or dried-out pieces. A 12-inch skillet gives the ingredients room to cook in a broad layer; crowding them makes moisture harder to cook off.
Cold rice helps the next stage along because its grains are firmer and easier to separate than warm, freshly cooked rice. Break up any clumps before adding it, then toss until the sauce reaches all the grains. When you press the rice into an even layer, it gets direct contact with the skillet instead of steaming in a loose pile.
What the Kimchi, Gochujang, and Cold Rice Bring to the Pan
- Vegan kimchi — It supplies the fermented tang and much of the dish’s character. Chop larger pieces so the kimchi distributes through the rice instead of landing in a few big bites; its moisture cooks off in the skillet.
- Vegan gochujang — This Korean chile paste adds heat, savory depth, and a thick texture that clings to the rice. Stir it together with the soy sauce before the rice goes in so you don’t end up with concentrated pockets of paste.
- Cold cooked rice — Day-old rice is especially handy because the grains are firm and separate easily. Whatever kind of rice you use, break up the clumps first; rice that goes into the pan stuck together won’t coat as evenly.
- Yellow onion and garlic — The onion gives the skillet a mild, sweet base, while garlic brings a sharper aroma. Mince the garlic before cooking starts so it can go in with the kimchi and won’t sit in the hot pan while you chop.
- Scallions — The whites cook with the onion, and the greens go in at the finish. Keeping the pieces separate gives you a softer, mellow base and a brighter fresh note in the same dish.
- Neutral oil and toasted sesame oil — Neutral oil handles the skillet cooking without competing with the kimchi. Toasted sesame oil has a distinct nutty aroma, so it’s used at the end rather than as the main cooking oil.
- Soy sauce — It seasons the rice and rounds out the chile paste with a salty, savory note. Stir it in with the gochujang so the seasoning spreads through the pan.
Build the Rice in the Skillet, Then Let It Sit
Soften the Onion and Scallion Whites
Heat a 12-inch skillet over medium-high heat, add 1 tablespoon neutral oil, then add the onion and scallion whites. Stir them as they cook for about 3 minutes, until softened. They should smell sweet and savory without taking on dark color. If the onion starts to brown before it softens, keep it moving around the skillet.
Cook the Kimchi Until Fragrant
Add the garlic and kimchi, stirring for 3 to 4 minutes. The kimchi should smell fragrant, and most of its moisture should have evaporated before you move on. Keep the garlic moving through the mixture so it cooks alongside the kimchi rather than scorching against the skillet. If you still see a puddle of liquid, give the mixture a little more time to cook down.
Coat Every Grain
Stir in the gochujang and soy sauce until combined, then add the cold rice and remaining 1 tablespoon neutral oil. Toss and fold until the rice is evenly coated and no large clumps remain. Use a lifting motion to bring the kimchi mixture up from the bottom and through the rice. The color should look fairly even before you press the rice down.
Press, Fry, and Finish Off the Heat
Press the rice into an even layer and cook without stirring for 2 minutes. Toss again, then cook for about 1 minute more, until hot. Pull the skillet off the heat before stirring in the toasted sesame oil and scallion greens. The rice should be evenly seasoned, with some grains lightly crisped where they met the pan.
Easy Changes That Keep the Rice Frying Well
Use Brown Rice for a Chewier Bite
Swap in 4 cups of cold cooked brown rice, keeping the rest of the ingredients and method the same. Brown rice has a firmer, chewier texture than white rice, so separate the grains carefully before adding it to the skillet.
Make It Gluten-Free with Tamari
Replace the soy sauce with the same amount of gluten-free tamari, and use vegan kimchi and gochujang labeled gluten-free. Tamari keeps the salty, savory balance while the heat and tang still come from the kimchi and gochujang.
Make the Kimchi Pieces Smaller
For a more even distribution, chop the kimchi into small pieces before it hits the skillet, even if the pieces in your jar aren’t especially large. You’ll get a little kimchi in more bites, with less chance of a large piece pulling away from the rice.
Storage and Reheating
- Refrigerator: Cool promptly, refrigerate in a covered container within 2 hours, and use within 3 to 4 days. The grains soften as they sit, but the kimchi flavor remains savory and tangy.
- Freezer: Freeze portions in an airtight freezer-safe container for up to 1 month for the best texture. Thaw overnight in the refrigerator before reheating.
- Reheating: Reheat in a skillet over medium heat or in a covered microwave-safe dish, stirring partway through, until the rice reaches 165°F. Reheat only the portion you plan to eat; repeated heating dries the rice and isn’t a good way to handle leftovers.
Questions That Come Up While Making Kimchi Fried Rice
Vegan Kimchi Fried Rice
Ingredients
Equipment
Method
- Heat a 12-inch skillet over medium-high heat, then add 1 tablespoon neutral oil.
- Add the onion and scallion whites and cook, stirring, until softened, about 3 minutes.
- Add the garlic and kimchi and cook, stirring, until the kimchi is fragrant and most of its moisture has evaporated, 3 to 4 minutes.
- Stir in the gochujang and soy sauce until combined.
- Add the rice and remaining 1 tablespoon neutral oil.
- Toss and fold the rice until evenly coated.
- Press the rice into an even layer and cook without stirring for 2 minutes.
- Toss again and cook until hot, about 1 minute more.
- Remove the skillet from the heat.
- Stir in the sesame oil and scallion greens.