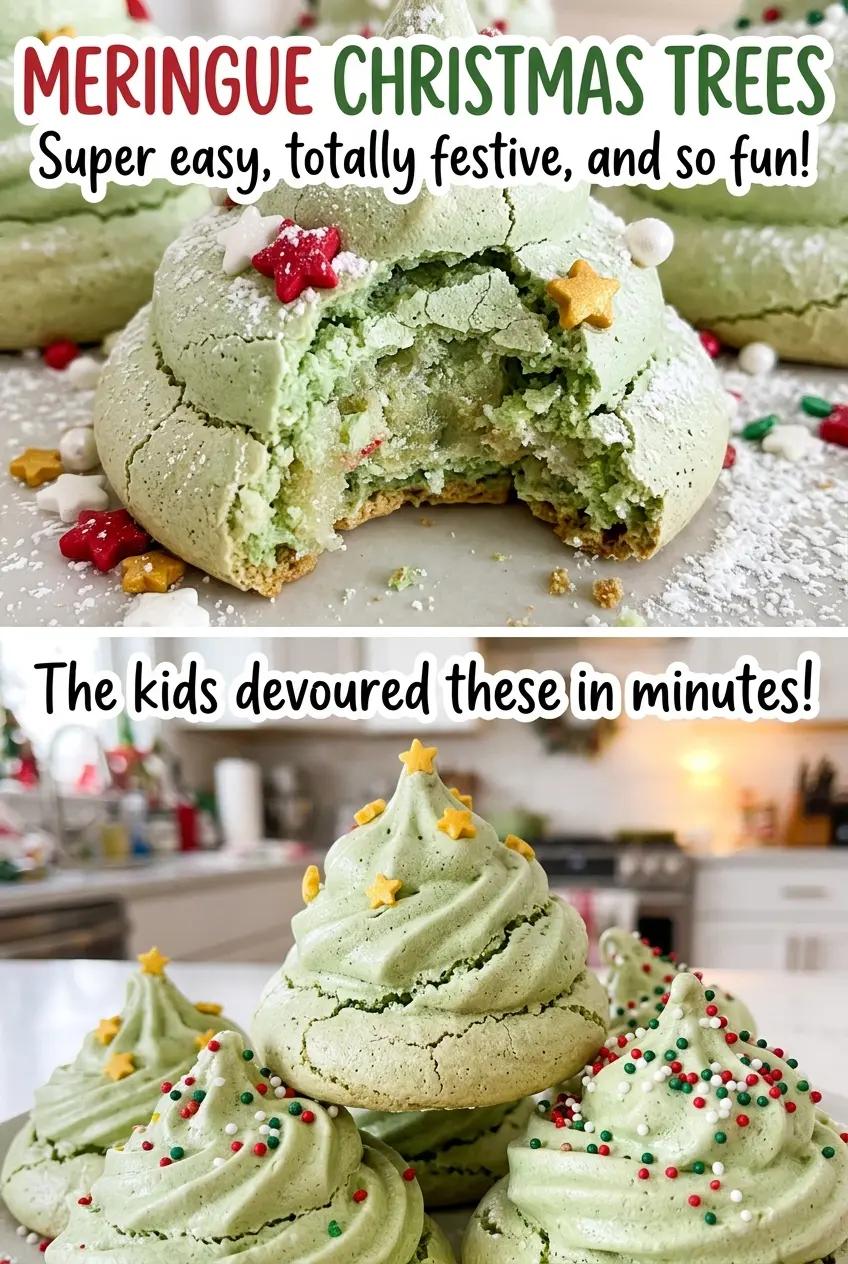
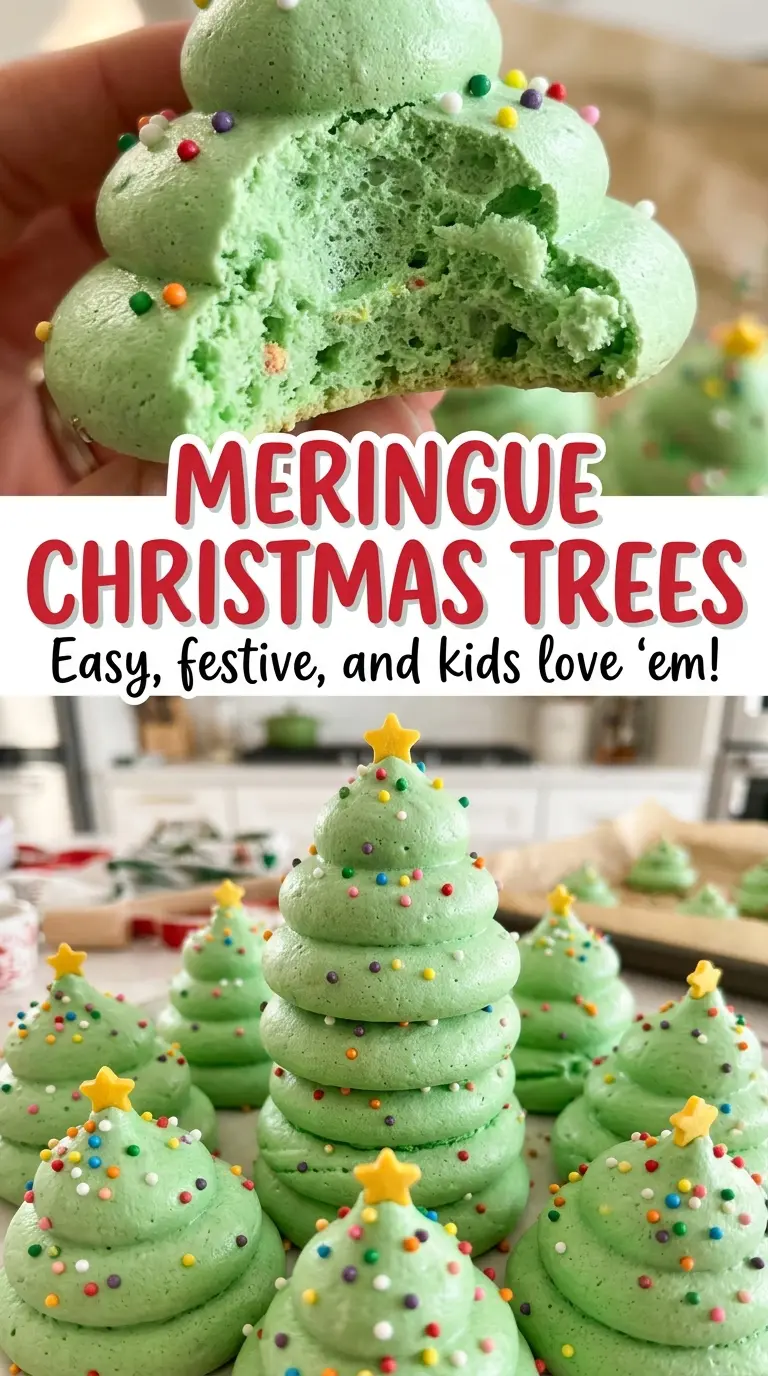
The first thing you notice is how quiet the oven needs to be: at a low 200°F, the meringue dries instead of browning, keeping these little trees pale green and crisp. I pipe each one in three shrinking stars, and the ridges from the large star tip give the branches their shape without any extra decorating.
Meringue Christmas Trees depend on a smooth, stable foam, so I warm the egg whites and sugar together before beating them. That gentle start helps the sugar dissolve before the mixture goes into the mixer; gritty sugar can leave the finished meringues sticky or rough. Once the meringue is glossy and holds stiff peaks, the trees are ready to pipe, sprinkle, and dry until they lift cleanly from the parchment. They’re light, crisp little bites with a soft vanilla note and a cheerful scatter of sprinkles.
Kitchen Note
Keep the three piped stars centered, with each tier a little smaller than the one below. A slight overlap helps the layers read as one tree instead of three separate rosettes.
Save these Meringue Christmas Trees for a crisp, vanilla-scented holiday treat with bright green branches and a sprinkle finish.
Why These Trees Need a Dissolved-Sugar Start, Not Just More Beating
Whipping egg whites can make a lot of volume, but it can’t dissolve sugar that’s still gritty. If the sugar stays granular, it may show up later as a rough texture or syrupy beads on the surface. Warming the whites, sugar, and cream of tartar together over gently simmering water gives the sugar time to dissolve before the foam is built.
The bowl should sit above the water, not in it. Direct contact can heat the egg whites unevenly, while steady whisking keeps the mixture moving as it warms. You’re looking for a smooth mixture before you reach for the hand mixer; rub a little between clean fingers and it shouldn’t feel sandy. Then the mixer can do its job: adding air and turning that smooth base into a glossy meringue sturdy enough to hold the piped tree shape.
What Gives the Meringue Its Structure—and What’s Just for Looks
- Egg whites — These are the foam itself, so use large eggs and bring the whites to room temperature before starting. Keep the yolks out of the whites; even a little fat can make it harder to build a firm meringue. Carton whites aren’t my pick for this batch because their whipping performance can vary.
- Granulated sugar — Regular granulated sugar gives the meringue its sweetness and helps it set into a crisp shell. There’s no need for a specialty sugar, but it does need to dissolve fully in the warm mixture; coarse or clumped sugar is more likely to leave a gritty finish.
- Cream of tartar — This acid helps stabilize the egg-white foam as it’s whipped. Keep it in rather than skipping it; the meringue has to hold firm peaks for the stacked piping to stay defined.
- Vanilla extract — Vanilla rounds out the sweetness without competing with the green color or sprinkles. Use an extract you enjoy, since its flavor is easy to notice in a simple meringue.
- Green gel food coloring — Gel coloring gives the trees their color without adding much liquid to the foam. Liquid coloring can thin the meringue, so stick with gel for this shape.
- Small assorted sprinkles — Small pieces sit neatly on the piped ridges and add a little crunch. Larger, heavier decorations are more likely to slide off the narrow tiers before they dry.
Building a Glossy Foam and Drying Trees That Lift Cleanly
Warm the whites and dissolve the sugar
Heat the oven to 200°F and line two rimmed baking sheets with parchment. Set a heatproof bowl over a saucepan of gently simmering water, checking that the bottom of the bowl doesn’t touch the water. Add the egg whites, sugar, and cream of tartar, then whisk constantly for 5 to 8 minutes, until the sugar dissolves and the mixture reaches 160°F. If the water boils hard or the bowl touches it, lift the bowl briefly and lower the heat so the whites warm gently.
Beat until the peaks stand up
Take the bowl off the heat and beat the mixture on high with a hand mixer for 8 to 10 minutes. The meringue should look glossy, not foamy or dull, and hold stiff peaks when you lift the beaters. If the peaks slump over, keep beating and check again rather than piping a soft foam that won’t support the tiers. Beat in the vanilla and green gel coloring until the color is evenly blended.
Pipe the tiers and add the sprinkles
Fit a piping bag with a large star tip and fill it with the green meringue. Pipe 24 trees, each about 2 inches tall, onto the prepared sheets, making three stacked star-shaped tiers that decrease in size toward the top. Keep the trees similar in height so the two trays dry at a similar pace. Add the small sprinkles while the piped surface is still soft enough for them to adhere.
Dry slowly, then cool in the oven
Bake the trees for 45 minutes, then switch the sheets between racks and rotate them front to back. Continue baking for 45 to 75 minutes, until the meringues feel dry and lift cleanly from the parchment. If one sticks or feels tacky, it needs more drying time rather than a hotter oven. Turn off the oven and leave the trees inside with the door closed until completely cool, about 1 hour.
Two Simple Ways to Change the Look of the Trees
Snowy white vanilla trees
Leave out the green gel coloring and keep the rest of the meringue the same. The trees will be ivory rather than green, with the sprinkles providing the color and the vanilla coming through a little more clearly.
Bare green trees
Skip the sprinkles and pipe the green meringue as usual. The result is a plainer, lightly sweet tree with clean star-shaped ridges; leaving off the decorations also makes the piping itself the focus.
Storage and Reheating
- Room temperature: Store completely cooled trees in an airtight container in a cool, dry place for up to 2 weeks. Humidity can soften the crisp shell.
- Freezer: I don’t recommend freezing them; condensation as they thaw can make the meringue sticky and fragile.
- Reheating: These aren’t reheated. Keep them away from steam and moisture rather than warming them, which can cause browning without reliably restoring a crisp texture.
Questions I Get Asked About These Meringue Trees
Meringue Christmas Trees
Ingredients
Equipment
Method
- Heat the oven to 200°F.
- Line two rimmed baking sheets with parchment paper.
- Put the egg whites, sugar, and cream of tartar in a heatproof bowl set over a saucepan of gently simmering water, making sure the bowl does not touch the water.
- Whisk constantly until the sugar dissolves and the mixture reaches 160°F, about 5 to 8 minutes.
- Remove the bowl from the heat.
- Beat with a hand mixer on high until the meringue is glossy and holds stiff peaks, about 8 to 10 minutes.
- Beat in the vanilla and green food coloring until evenly blended.
- Fit a piping bag with a large star tip and fill it with the meringue.
- Pipe 24 trees about 2 inches tall onto the prepared sheets, making three stacked star-shaped tiers that get smaller toward the top.
- Add sprinkles to the trees.
- Bake for 45 minutes.
- Switch the sheets between racks and rotate them front to back.
- Continue baking for 45 to 75 minutes, until the meringues feel dry and lift cleanly from the parchment.
- Turn off the oven and leave the trees inside with the door closed until completely cool, about 1 hour.