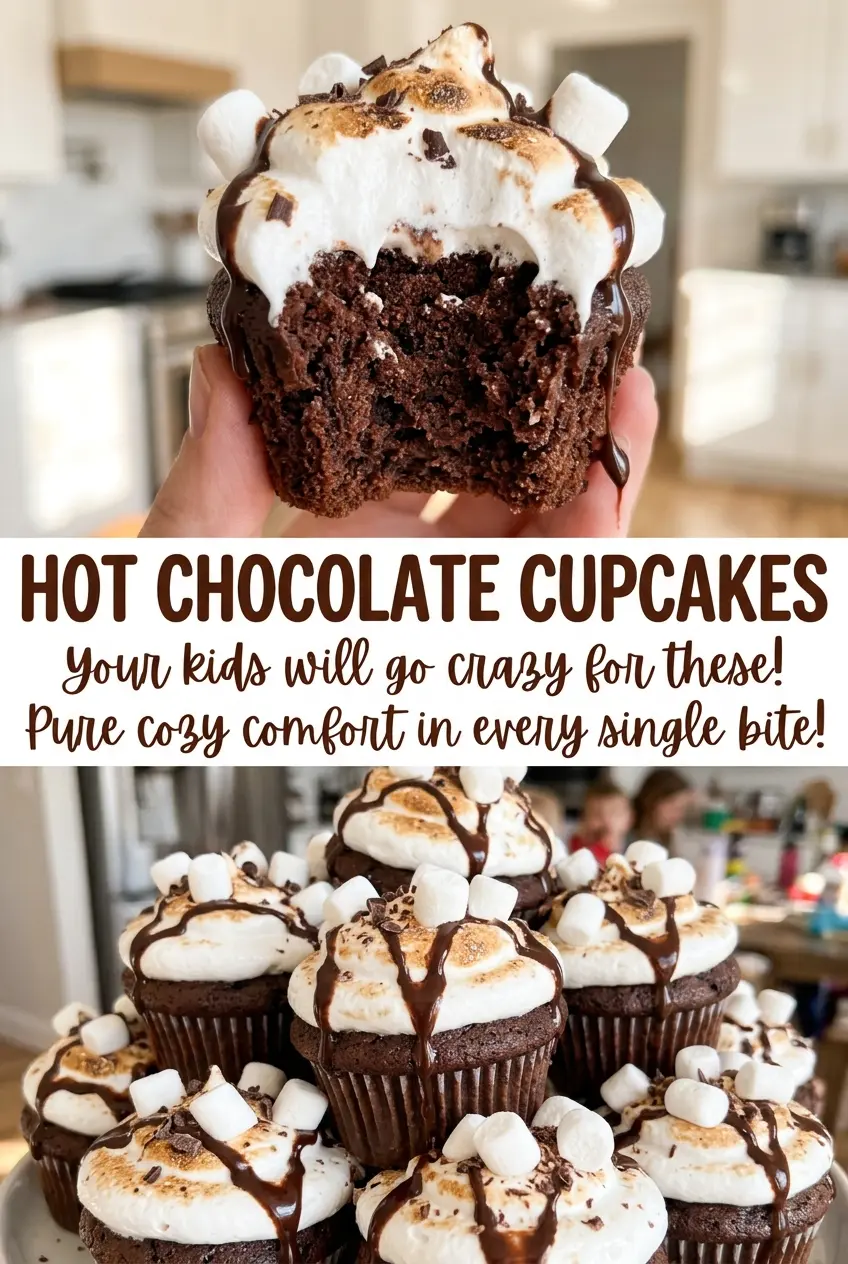
Hot water turns this chocolate batter loose enough to pour, which can look like a mistake if you’re expecting a thick, scoopable mix. It isn’t. These hot chocolate cupcakes bake up tender and deeply cocoa-flavored, with a soft crumb that stays moist beneath a cloud of marshmallow frosting.
I whisk the dry ingredients first, then add the egg, milk, oil, and vanilla just until they come together. The hot water goes in slowly at the end. That order keeps the batter smooth without working it more than it needs.
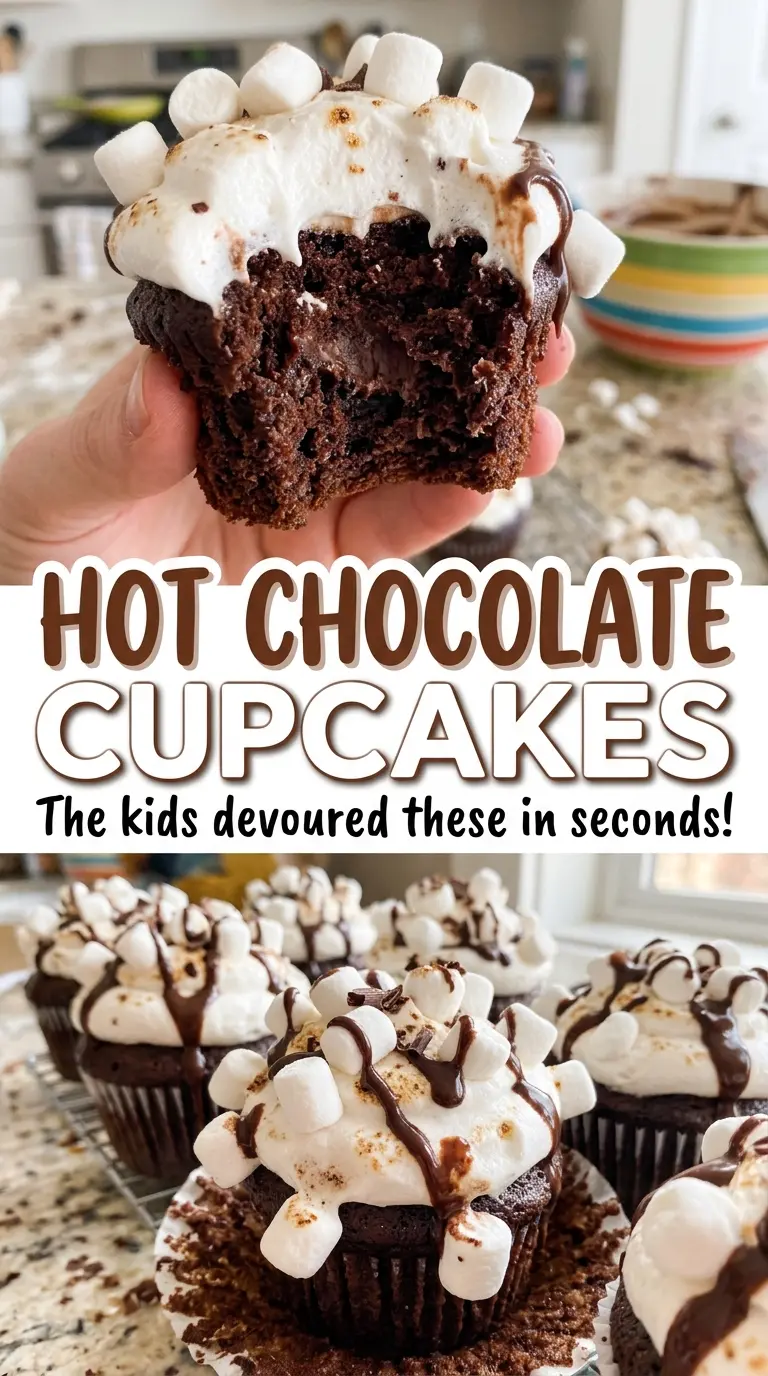
The frosting brings the hot chocolate feeling without adding another layer of sweetness to the cake itself. Marshmallow creme makes it fluffy and easy to spread or pipe, while the cupcake underneath stays soft and light. Each bite is cocoa-rich, sweet, and finished with that familiar marshmallow taste.
Kitchen Note
For frosting that turns out creamy instead of greasy, let the butter soften until it yields when pressed but still holds its shape. Beat it smooth before adding the marshmallow creme; melted butter won’t give you the same fluffy finish.
Save these hot chocolate cupcakes for a bake when you want soft cocoa cake topped with fluffy marshmallow frosting.
Why Hot Water Belongs in This Chocolate Cupcake Batter
Milk gives the batter richness, while hot water helps the cocoa disperse evenly and brings its chocolate aroma forward. It’s a small addition, but it makes a noticeable difference in a cake where cocoa is the main flavor. The water also gives the batter a thin, pourable consistency; thickening it with extra flour would work against the tender crumb these cupcakes are meant to have.
Whisk it in slowly after the wet and dry mixtures have just come together. That gradual addition gives you time to smooth out the batter without chasing dry pockets around the bowl. Stop as soon as it looks even. Extra mixing after the flour is hydrated can make cupcakes tougher, and there’s no benefit to beating this batter until it looks thick.
What Gives These Cupcakes Their Cocoa Flavor and Marshmallow Finish
- Unsweetened cocoa powder — Cocoa carries the chocolate flavor without adding sweetness, so a standard grocery-store unsweetened cocoa works well. Choose a fresh, aromatic container; cocoa that has been open for a long time can taste flat. Dutch-process cocoa has different acidity and may change how the leaveners behave, so I stick with regular unsweetened cocoa here.
- All-purpose flour and the leaveners — Flour gives the cupcakes enough structure to hold the frosting, while baking powder and baking soda help the crumb rise. These pantry staples don’t need to be premium brands; freshness matters more for the leaveners than price.
- Whole milk, egg, and vegetable oil — The egg binds the batter, milk adds moisture, and oil keeps the crumb soft after cooling. Whole milk gives the cake more body than water alone, and a neutral vegetable oil lets the cocoa stay out front.
- Hot water — It loosens the batter and helps the cocoa blend in smoothly. Add it after the other wet ingredients are incorporated rather than using it to replace the milk; the two play different roles in the texture.
- Marshmallow creme — This is what makes the frosting taste like marshmallow and gives it a light, spreadable texture. Mini marshmallows aren’t a direct substitute because they won’t beat into the same smooth frosting.
- Butter and powdered sugar — Butter brings richness, and powdered sugar gives the frosting enough body to spread or pipe. Regular powdered sugar is right for this job; granulated sugar won’t dissolve into the same smooth finish.
The Mixing and Baking Cues That Keep the Crumb Tender
Whisk the Dry Ingredients Until the Cocoa Is Even
Heat the oven to 350°F and line a 12-cup muffin pan with paper liners. Whisk the flour, granulated sugar, cocoa powder, baking powder, baking soda, and salt in a large bowl until the cocoa is evenly distributed. Break up any visible cocoa clumps as you whisk, since dry pockets can leave bitter streaks in the baked cupcakes. A uniform brown mixture is your cue to move on.
Combine the Wet Ingredients Without Overworking
In a medium bowl, whisk the egg, milk, oil, and vanilla until blended. Pour that mixture into the dry ingredients and whisk just until no large streaks of flour remain. It’s fine if the mixture looks a little uneven at this point; the hot water will smooth it out. Don’t keep whisking simply to make it look perfectly glossy before the next addition.
Whisk in the Hot Water Slowly
Add the hot water in a slow stream while whisking, giving the batter time to come together as you pour. It should look smooth and noticeably thin when you’re finished. Divide it evenly among the lined muffin cups, taking care not to fill one cup much more than the others. The thin batter is expected, not a sign that it needs extra flour.
Bake Until a Few Moist Crumbs Cling to the Tester
Bake for 18 to 22 minutes, then insert a toothpick into the center of a cupcake. You’re looking for a few moist crumbs, not wet batter and not a completely dry toothpick; baking until dry can take the cupcakes past their softest point. Cool them in the pan for 10 minutes before transferring them to a rack. Let them cool completely before frosting so the topping stays in place.
Beat the Frosting Until Fluffy, Then Finish the Cupcakes
Beat the softened butter with an electric mixer until smooth and creamy, about 1 to 2 minutes. Beat in the marshmallow creme, then add the powdered sugar gradually along with the vanilla and salt. Continue beating until the frosting looks fluffy, about 2 minutes; scrape down the bowl if sugar is clinging to the sides. Spread or pipe the frosting over the completely cooled cupcakes.
Two Useful Ways to Adapt These Hot Chocolate Cupcakes
A dairy-free batch
Use unsweetened oat milk in the cupcake batter, then replace the butter and marshmallow creme with vegan butter and vegan marshmallow creme for the topping. The cake stays tender, though the frosting may be a little softer than the butter version, so spread it on rather than piping tall swirls.
Use melted butter instead of oil
For a slightly richer, less plush crumb, replace the vegetable oil with an equal volume of melted butter that has cooled until it’s no longer hot. Whisk it with the egg, milk, and vanilla as you would the oil. The cupcakes will still be tender, but they won’t stay quite as soft as the oil-based version.
Storage and Reheating
- Refrigerator: Keep frosted cupcakes in an airtight container for up to 3 days. The cake firms up when cold, so let a cupcake sit at room temperature before eating.
- Freezer: Freeze the unfrosted cupcakes, wrapped individually and placed in a freezer-safe bag, for up to 2 months. Thaw them at room temperature before adding the frosting.
- Reheating: These are best served at room temperature rather than reheated. Don’t microwave a frosted cupcake; the marshmallow topping softens quickly and can turn sticky.
Questions That Come Up While Baking These Cupcakes
Hot Chocolate Cupcakes
Ingredients
Equipment
Method
- Heat the oven to 350°F.
- Line a 12-cup muffin pan with paper liners.
- In a large bowl, whisk together the flour, granulated sugar, cocoa powder, baking powder, baking soda, and salt.
- In a medium bowl, whisk the egg, milk, oil, and vanilla extract.
- Pour the egg mixture into the dry ingredients and whisk just until combined.
- Slowly whisk in the hot water until the batter is smooth.
- Divide the thin batter evenly among the liners.
- Bake for 18 to 22 minutes, until a toothpick inserted in the center comes out with a few moist crumbs.
- Cool in the pan for 10 minutes.
- Transfer the cupcakes to a rack to cool completely.
- In a large bowl, beat the butter with an electric mixer until smooth and creamy, about 1 to 2 minutes.
- Beat in the marshmallow creme.
- Gradually beat in the powdered sugar, vanilla extract, and salt until fluffy, about 2 minutes.
- Spread or pipe the frosting onto the completely cooled cupcakes.