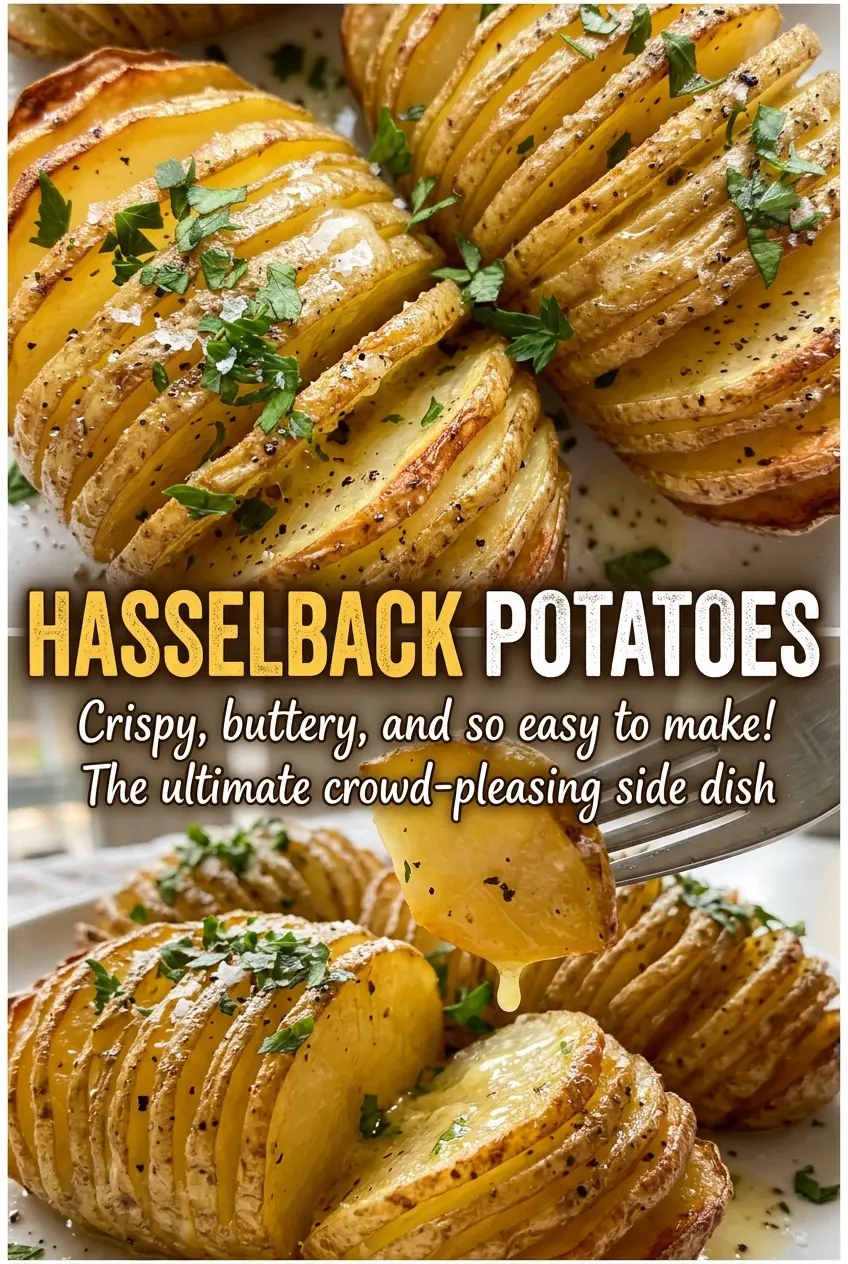
At the 30-minute mark, the potato slices should be just starting to fan apart, but they won’t look crisp yet. That’s the point when I brush melted butter between the layers, then return these Hasselback Potatoes to the oven so the edges can brown while the centers turn tender.
The slice-through-without-cutting-through part sounds fussy, but two chopsticks or wooden spoon handles give the knife a clear stopping point. Keep the bottom of each potato intact and the slices thin, and they’ll open into neat layers as they bake. The finished potatoes have crisp edges, soft centers, and enough buttery space between the slices to make every bite interesting.
Kitchen Note
Give the potatoes their full five-minute rest before serving. They’re tender straight from the oven, and that short pause helps the sliced layers hold together when you lift them.
Save these Hasselback Potatoes for crisp, fanned edges and a buttery center in every slice.
The Bottom Has to Stay Whole for the Slices to Fan
Hasselback potatoes aren’t just potatoes with a lot of cuts. Leaving the bottom intact turns each potato into one connected piece, so the slices can open like a fan without falling apart. That gives the hot oven access to the edges while the center stays soft and fluffy.
Cut all the way through and you’ll have separate potato slices instead of that accordion shape. Cut too thick, and the layers won’t open as readily; they can stay crowded together rather than developing crisp edges. The chopsticks or wooden spoon handles act as a simple depth stop, which makes the 1/8-inch cuts much easier to control than judging by eye alone.
Keep the potato steady between the guides and use a sharp knife with even strokes. The guides should stop the blade before it reaches the board, but they don’t force the spacing for you. Consistent slices matter: thinner cuts open more easily, while uneven cuts can leave some edges browned before the thicker sections are tender.
Why Russets, Olive Oil, and Butter Each Have a Separate Job

- Russet potatoes — Their starchy, fluffy interior suits the contrast between a tender middle and crisp outer edges. Choose potatoes that are similar in size so they bake at roughly the same pace; ordinary grocery-store russets work well. Scrub them and dry them thoroughly before slicing, since a wet surface makes it harder for the oil to coat the skin evenly.
- Olive oil — Oil goes on before the first bake, coating the outside so the potato can roast rather than dry out. A basic everyday olive oil is fine here; there’s no need to use a prized finishing oil. Brush across the skin and the cut surfaces you can reach.
- Unsalted butter — The butter goes on later, once the slices have begun to separate, so it can work down between the layers. Unsalted butter keeps the seasoning easier to control alongside the kosher salt. Melt it before you start the final stretch of baking so it’s ready to brush on.
- Kosher salt and black pepper — Seasoning the potatoes with the oil helps it cling across the surface. Kosher salt’s larger crystals are easy to distribute by hand, while black pepper adds a mild savory bite without competing with the potato and butter.
The Two Bakes That Take These Potatoes from Firm to Crisp
Set the Guides and Slice
Heat the oven to 425°F and line a rimmed baking sheet with parchment paper. Place one potato between two chopsticks or wooden spoon handles, then slice crosswise into 1/8-inch pieces. Let the handles stop the knife before it reaches the bottom so the potato stays connected. If the potato shifts as you cut, steady it before continuing rather than trying to correct a deep cut with the next slice.
Coat the Potatoes Before They Go into the Oven
Arrange the potatoes on the lined baking sheet and brush them all over with olive oil. Season with kosher salt and black pepper, spreading the seasoning across the tops and sides rather than leaving it in one spot. Keep the potatoes on the sheet with space around them so you can reach their surfaces with the brush. At this stage the slices may still sit close together; they’ll loosen as they bake.
Let the First Bake Open the Layers
Bake for 30 minutes, until the slices begin to fan apart. They won’t be crisp and brown at this point, so don’t wait for those finish cues before adding the butter. Melt the butter while the potatoes bake, then brush it over each potato and work it between the slices. The layers should be open enough to catch the butter, but handle them gently so the intact base doesn’t tear.
Bake Until the Edges Brown, Then Rest
Return the potatoes to the oven for 25 to 35 minutes more. Look for crisp, browned edges, and test the center with a knife; it should slide in easily. If the edges look ready but the center still resists the knife, use tenderness as your guide and continue baking within that finish window. Rest the potatoes for five minutes before serving.
Two Useful Ways to Adapt the Potatoes
Make the Potatoes Dairy-Free
Replace the melted butter with the same amount of olive oil for brushing between the slices. The potatoes will still brown and turn tender, though the finish will taste less rich and buttery. Use the oil at the same point in the bake, after the slices have started to fan.
Try the Same Cut with Sweet Potatoes
Use medium sweet potatoes in place of the russets, keeping the same slice thickness and oven setup. Their sweeter, denser flesh makes a softer, less fluffy center, and the slices may not fan quite as widely. Check each potato for browned edges and a knife-tender center rather than relying on appearance alone.
Storage and Reheating
- Refrigerator: Refrigerate leftovers within 2 hours and keep them covered for up to 4 days. The edges soften as the potatoes sit.
- Freezer: Freezing isn’t recommended; thawed potato tends to turn grainy, and the fanned slices lose their texture.
- Reheating: Reheat on a baking sheet in a 425°F oven until hot through and crisp at the edges. Avoid the microwave if you want the edges to stay crisp; it softens them further.
Questions I Get About Hasselback Potatoes
Hasselback Potatoes
Ingredients
Equipment
Method
- Heat the oven to 425°F.
- Line a rimmed baking sheet with parchment paper.
- Set a potato between two chopsticks or wooden spoon handles and cut crosswise into 1/8-inch slices, stopping when the knife reaches the guides so the bottom stays intact.
- Arrange the potatoes on the baking sheet.
- Brush the potatoes all over with the olive oil.
- Season the potatoes with the salt and pepper.
- Bake for 30 minutes, until the slices begin to fan apart.
- Brush the potatoes with the melted butter, working it between the slices.
- Bake for 25 to 35 minutes more, until the edges are crisp and browned and a knife slides easily into the centers.
- Rest for 5 minutes before serving.