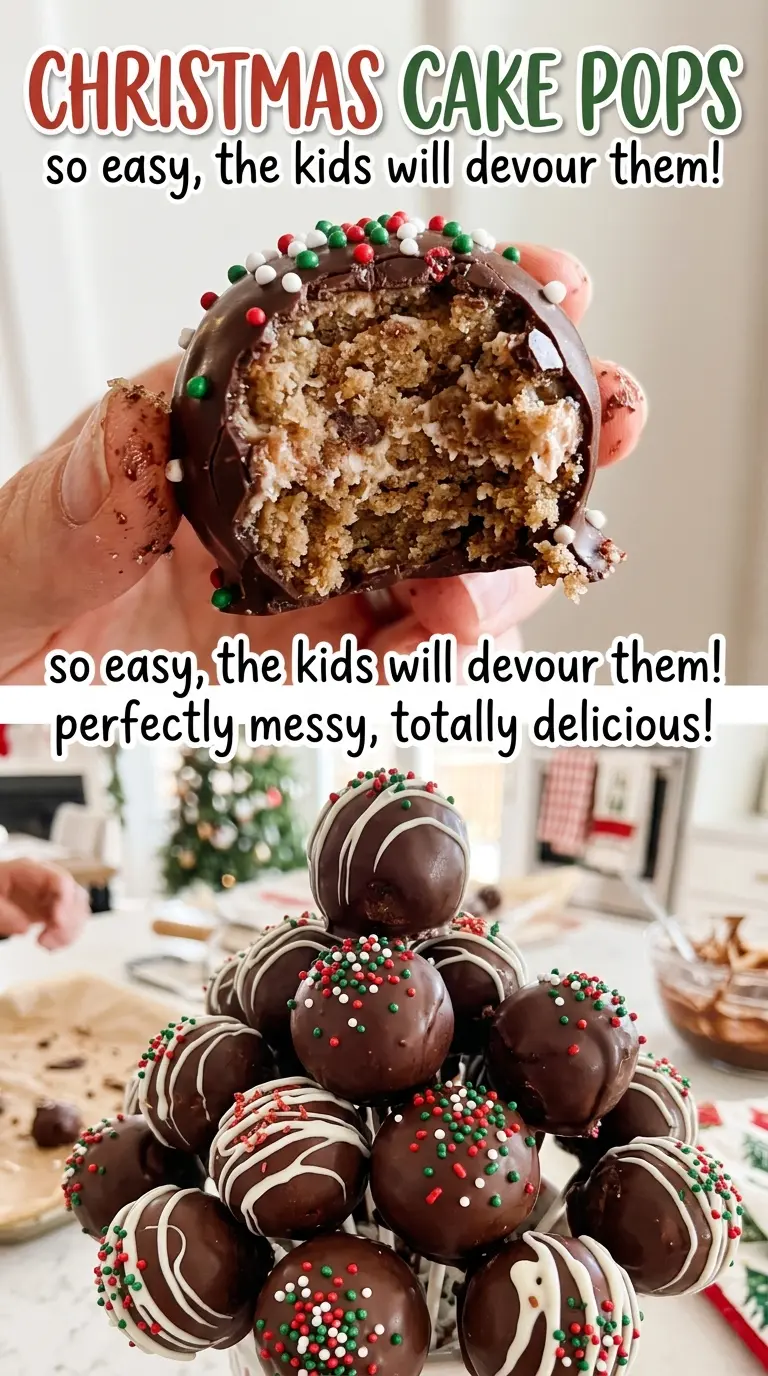
A cake ball can look perfectly round on the tray and still slide down its stick the moment it hits the coating. Keeping the balls small and giving the stick a little coating of its own solves that problem before dipping even begins. These Christmas cake pops pair soft vanilla cake with a smooth white shell, then finish with red-and-green sprinkles for a festive look.
I make the cake from scratch, then crumble it only after it’s completely cool. That gives the frosting a chance to bind the crumbs without turning them greasy or pasty. The coating gets a spoonful of shortening, which helps it flow smoothly around each ball, and the sprinkles go on while the coating is still wet. The finished pops have a tender cake center and a neat, crisp shell.

Kitchen Note
Add the sprinkles as soon as each pop comes out of the coating. Once that shell starts to set, they won’t cling as neatly, so I decorate one pop at a time.
Save these Christmas cake pops for a party tray or holiday bake day: soft vanilla centers, a white candy shell, and bright red-and-green sprinkles.
Why Oversized Cake Balls Slide Off Their Sticks
A cake pop has to balance on a narrow stick while you dip it into a cup of coating. Larger balls put more weight above that small support, which makes them more likely to slip or wobble. Keeping each one close to 1¼ inches gives you a manageable bite that’s easier to coat evenly and stand upright.
Consistency matters as much as size. If some balls are noticeably bigger than others, the smaller ones will finish dipping quickly while the larger ones take more coating and are harder to handle. I use the same gentle pressure as I roll each one, so the balls are compact enough to hold their shape without being packed dense. That even size also helps the batch of 24 look tidy together.
The stick needs a small anchor, too. A dab of melted coating on the end sets inside the cake ball and helps hold it in place while you dip. It’s a small detail, but it keeps the pop from rotating or pulling free when you lift it through the cup.
What Gives These Vanilla Cake Pops Their Tender Center
- All-purpose flour and baking powder — The flour gives the cake enough structure to crumble and roll, while baking powder keeps the baked cake light rather than dense. Ordinary all-purpose flour works well here; there’s no need for a specialty brand.
- Butter, sugar, and eggs — Softened butter beats smoothly with the sugar, and room-temperature eggs blend into that mixture more evenly than cold ones. This combination gives the cake its tender crumb; don’t swap in melted butter, which changes how the batter comes together.
- Whole milk — Milk loosens the batter and adds richness. Two-percent milk works in the same amount if that’s what you have, though the cake will be a little less rich.
- Vanilla extract — Vanilla gives the cake its familiar flavor, which works especially well with the white coating. Use the extract you already keep for baking; the cake’s texture doesn’t depend on a premium bottle.
- Prepared vanilla frosting — This is the binder for the cake crumbs, not a second layer of icing. Use prepared frosting so it’s consistent and easy to mix through the crumbs.
- White candy melts and vegetable shortening — Candy melts are made for dipping and set into a smooth shell. The shortening helps the melted coating flow; regular white chocolate chips don’t behave the same way in this coating method.
- Lollipop sticks and sprinkles — Sturdy sticks make the pops easier to dip and serve, while the red-and-green sprinkles provide the festive finish. The sprinkles are optional if you prefer a clean white shell.
The Four Stages That Keep Cake Pops Neat
Mixing a Light Vanilla Cake
Heat the oven to 350°F and coat a 9×13-inch baking pan with nonstick cooking spray. Whisk the flour, baking powder, and salt in a medium bowl. In a large bowl, beat the softened butter and sugar until fluffy, about 2 minutes, then beat in the eggs one at a time and mix in the vanilla. Add the flour mixture in three additions, alternating with the milk and beginning and ending with the flour; stop mixing as soon as the batter is combined.
Baking and Cooling Without Trapping Warmth
Spread the batter in the prepared pan and bake for 28–33 minutes, until a toothpick inserted in the center comes out clean. Let the cake cool in the pan for 15 minutes before turning it onto a wire rack. Cool it completely, about 1 hour, before crumbling; even a warm center can soften the frosting and make the mixture harder to roll.
Rolling Firm, Even Cake Balls
Crumble the cooled cake into a large bowl, then add the prepared vanilla frosting and mix until the crumbs are evenly moistened. Pinch a little mixture between your fingers: it should hold together when squeezed, not fall apart in dry crumbs. Roll it into 24 balls about 1¼ inches wide and set them on a parchment-lined baking sheet. Refrigerate for 30–45 minutes, until the balls feel firm enough to handle.
Dipping and Letting the Shell Set
Melt the white candy melts and vegetable shortening together in a tall, microwave-safe cup, stirring every 30 seconds until smooth. Dip the tip of each stick about ½ inch into the coating, insert it halfway into a cake ball, and return the pops to the refrigerator for 10 minutes. Dip each pop fully, gently tap off excess coating, add the sprinkles, and stand it upright in a cake-pop stand or foam block. Let the coating set at room temperature for 20–30 minutes before serving.
Two Easy Ways to Change the Finish or Format
Keep the White Shell Plain
Leave off the red-and-green sprinkles for a simple white finish. The shell stays crisp and sweet, and the pops still have the same vanilla cake center.
Make Cake Truffles Instead
Skip the lollipop sticks and shape the mixture into the same-sized balls. Dip and decorate them as usual, then set them on the parchment-lined baking sheet to set. They’re easier to pack in a container, though you’ll need a fork or your fingers to serve them.
Storage and Serving
- Refrigerator: Keep the finished pops in an airtight container for up to 4 days. The cake center firms up when cold.
- Freezer: Freeze the set pops in a single layer until firm, then transfer them to an airtight freezer container for up to 1 month. Thaw them in the refrigerator to limit condensation on the coating.
- Serving: Serve chilled or let out only the number you plan to serve. Don’t microwave them; the coating can soften before the cake center warms evenly.
Questions I Get Asked About Christmas Cake Pops
Christmas Cake Pops
Ingredients
Equipment
Method
- Heat the oven to 350°F.
- Coat a 9x13-inch baking pan with nonstick cooking spray.
- Whisk the flour, baking powder, and salt together in a medium bowl.
- Beat the butter and sugar in a large bowl until fluffy, about 2 minutes.
- Beat in the eggs one at a time.
- Mix in the vanilla.
- Add the flour mixture in three additions, alternating with the milk and beginning and ending with the flour, mixing just until combined.
- Spread the batter in the pan.
- Bake for 28–33 minutes, until a toothpick inserted in the center comes out clean.
- Cool in the pan for 15 minutes.
- Turn the cake out onto a wire rack.
- Cool completely, about 1 hour.
- Crumble the cooled cake into a large bowl.
- Add the frosting and mix until evenly moistened and the mixture holds together when squeezed.
- Roll the mixture into 24 balls about 1 1/4 inches wide.
- Place the balls on a parchment-lined baking sheet.
- Refrigerate for 30–45 minutes until firm.
- Melt the candy melts and shortening together in a tall, microwave-safe cup, stirring every 30 seconds until smooth.
- Dip the tip of each lollipop stick about 1/2 inch into the melted coating.
- Insert each stick halfway into a cake ball.
- Return the balls to the refrigerator for 10 minutes.
- Dip each cake pop fully into the coating.
- Gently tap off the excess.
- Immediately add sprinkles.
- Stand the pops upright in a cake-pop stand or foam block.
- Let the coating set at room temperature for 20–30 minutes before serving.