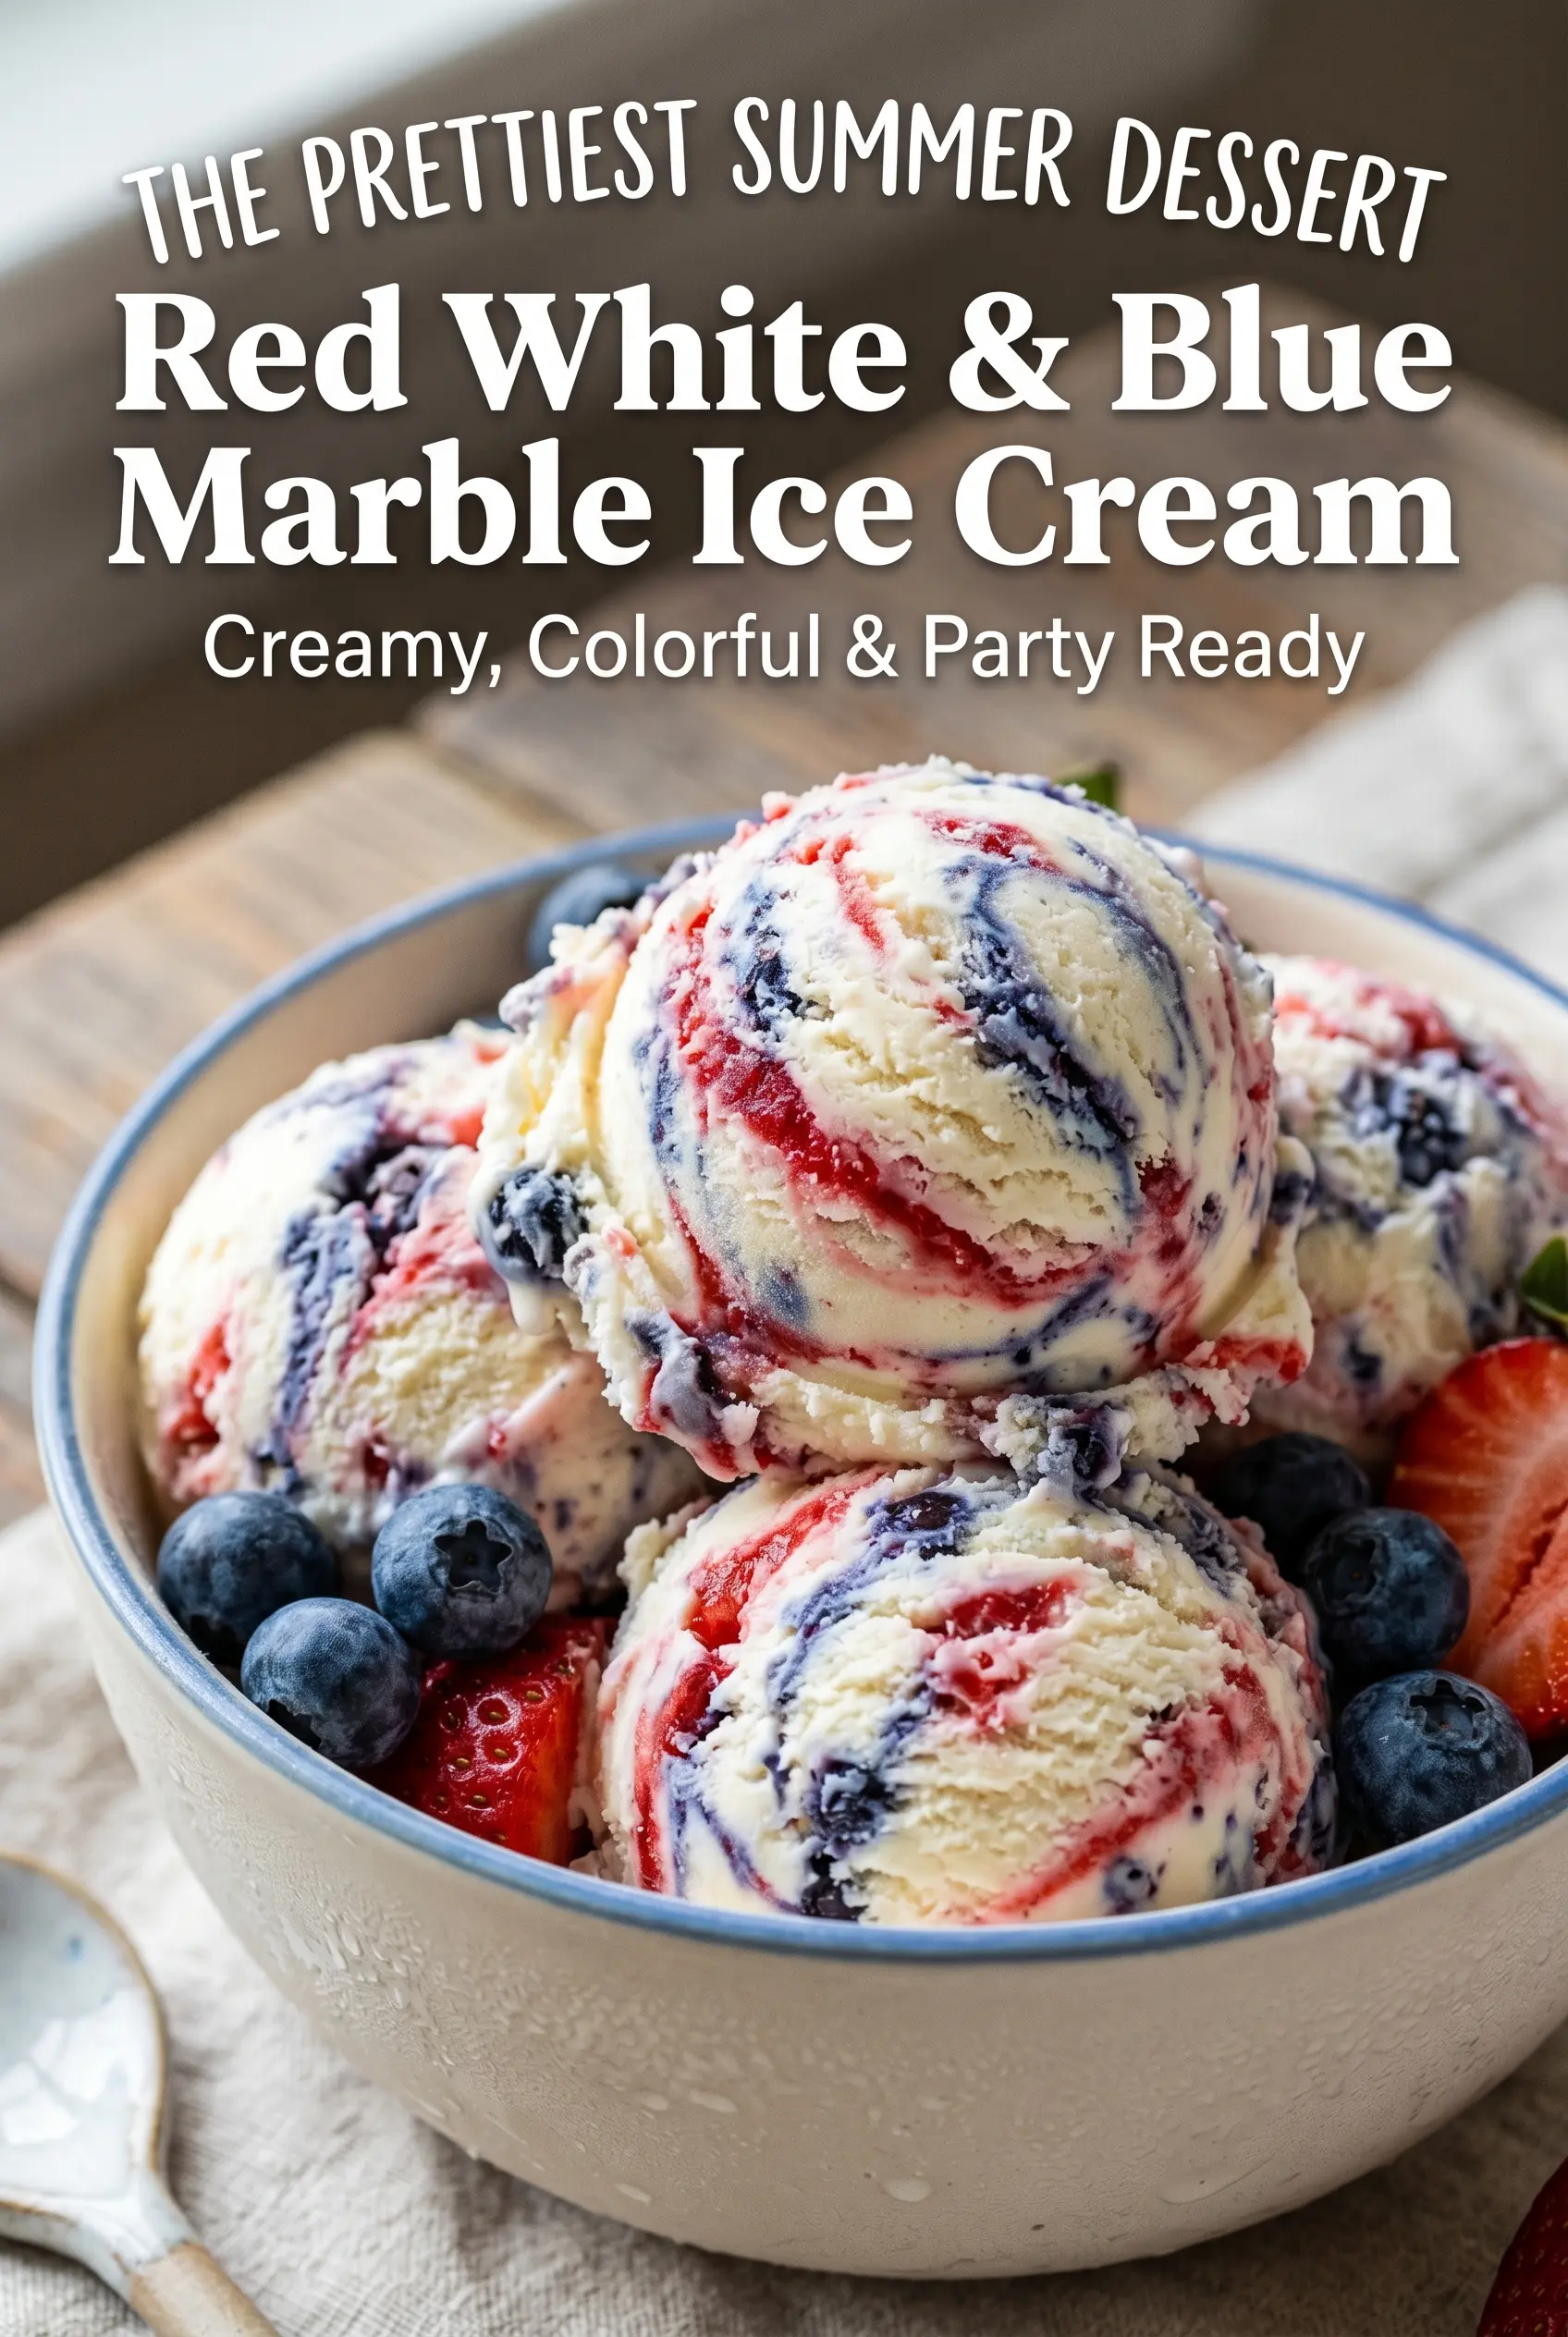
Swirls of strawberry and blueberry cut through a rich vanilla base and turn this ice cream into something that feels a little special before anyone even takes a bite. The texture is creamy and scoopable, with bright fruit ribbons that stay distinct instead of disappearing into a bland pink mix. That contrast is what makes it worth making. You get the cool, milky vanilla first, then a burst of cooked berry flavor that tastes cleaner and deeper than fresh fruit stirred straight into the base.
The trick is cooking the fruit down before it ever touches the ice cream. Raw berries bring too much water and they turn icy in the freezer; a quick simmer with sugar and lemon juice concentrates the flavor and gives you a sauce that ribbons instead of hardening into chunks. Whipped cream and sweetened condensed milk build the no-churn base, which stays soft enough to scoop but firm enough to hold those marbled streaks.
Below, you’ll find the easiest way to swirl the layers without overmixing them, plus a few useful swaps if you want to make it dairy-free or change the fruit. The color pattern looks festive, but the real win is how balanced the final texture stays from the first scoop to the last.
The berry swirls stayed beautiful after freezing, and the strawberry sauce thickened up just enough that it didn’t turn icy. I served it at a barbecue and everyone kept asking how the colors stayed so clean.
Keep this Red White & Blue Marble Ice Cream on hand for a frozen dessert that swirls strawberry and blueberry into every creamy scoop.
The Reason the Berry Swirls Stay Bright Instead of Bleeding Together
The biggest mistake with marbled ice cream is adding fruit that’s too thin. When the sauce has too much free water, it freezes into pale ice crystals and the swirls vanish into the base. Cooking the berries with sugar and lemon juice does two things at once: it pulls out flavor and it gives the mixture enough body to sit in ribbons instead of sinking into the cream.
There’s another detail that matters. Both fruit sauces need to be completely cool before they hit the whipped cream mixture. If they’re even a little warm, they loosen the base and you lose that airy texture the no-churn method depends on. Cold fruit sauce also holds its shape better when you drag a knife through the pan.
What Each Ingredient Is Actually Doing in This Ice Cream
- Heavy whipping cream — This is what gives the ice cream its body without an ice cream machine. Whip it to stiff peaks, not soft ones, or the base won’t hold the swirls as it freezes.
- Sweetened condensed milk — This adds sweetness and keeps the texture smooth. It also helps prevent the ice cream from freezing hard, which is why this style stays scoopable straight from the freezer.
- Vanilla extract — Vanilla is the quiet part of the recipe that makes the fruit taste more vivid. Use a good one if you have it, since the base is simple and there’s nowhere for weak vanilla to hide.
- Strawberries and blueberries — Fresh or frozen both work, but frozen berries need a few extra minutes on the stove because they release more liquid. You want a sauce that coats a spoon, not a watery compote.
- Lemon juice — The acid keeps the fruit flavor bright and prevents the swirl from tasting flat. Don’t skip it; even a small amount sharpens both berries.
- Sugar — A little sugar helps the fruit break down faster and balances the tartness. If your berries are very sweet, reduce it slightly, but don’t leave it out or the sauces can taste sharp after freezing.
Building the Swirl Without Losing the Marble
Cooking the Fruit Down
Put the strawberries or blueberries in a small saucepan with sugar and lemon juice, then cook over medium heat until the fruit softens and releases a glossy juice. For strawberries, you want the pieces to collapse and the pan to look jammy; for blueberries, wait until the skins burst and the mixture thickens slightly. If it still looks thin enough to pour like juice, keep it on the heat a little longer. Thin sauce disappears in the freezer, and that’s the fastest way to lose the marbled look.
Whipping the Cream Base
Whip the heavy cream in a large bowl until it holds stiff peaks that stand up cleanly when you lift the beaters. If the cream is underwhipped, the finished ice cream will freeze denser and won’t scoop as nicely. Fold in the sweetened condensed milk and vanilla with a spatula, using broad strokes so you keep as much air in the mixture as possible. Stirring hard knocks out the volume you just built.
Layering and Swirling
Spread a third of the cream base into the loaf pan, then dollop on the cooled fruit sauces in uneven spoonfuls. Repeat the layers until everything is used, leaving some white space in between the colors. Drag a knife through the pan in slow figure-eight motions just two or three times. If you keep swirling, the colors blend into a pastel base instead of staying distinct.
Freezing to the Right Texture
Cover the pan tightly and freeze it for at least 6 hours, though overnight gives the cleanest scoop. The center should feel firm all the way through before you try to serve it. If you rush it, the edges will hold shape but the middle will collapse into soft cream. Let it sit at room temperature for a few minutes before scooping so the fruit ribbons cut cleanly.
How to Adapt the Swirl for Different Diets and Different Fruit
Dairy-Free Version
Use full-fat coconut cream instead of heavy whipping cream and swap in a dairy-free sweetened condensed milk. The texture will be a little softer and you’ll get a light coconut note, but the swirl technique stays the same.
Mixed Berry Swap
Raspberries work especially well in place of strawberries if you want a sharper, more tart red swirl. Blackberries also work, but they create a darker color and a slightly seedier texture, so strain the sauce if you want a smoother finish.
Lower-Sugar Version
You can reduce the sugar in the fruit sauces if your berries are in season and naturally sweet, but keep enough to help them break down and thicken. Cutting the sugar too far leaves the swirls thin and icy, which changes the whole texture.
Make It Gluten-Free
This recipe is naturally gluten-free as written, which is one of the nicest things about it. Just check the labels on the sweetened condensed milk and vanilla if you’re cooking for someone with a sensitivity, since those packaged items vary by brand.
Storage and Reheating
- Refrigerator: Not recommended. This ice cream needs to stay frozen or it will melt into a loose cream.
- Freezer: Keeps well for about 2 weeks when wrapped tightly. After that, the texture can pick up ice crystals and the swirls start to dull.
- Reheating: Not applicable. Let it sit at room temperature for 5 to 10 minutes before scooping so the knife or scoop slides through cleanly without cracking the top.
Answers to the Questions Worth Asking
Red White & Blue Marble Ice Cream
Ingredients
Equipment
Method
- Combine strawberries, sugar, and lemon juice in a saucepan over medium heat.
- Cook for 5–7 minutes until the strawberries are softened and the mixture looks slightly syrupy.
- Blend until smooth, then cool completely to room temperature.
- Combine blueberries, sugar, and lemon juice in a saucepan over medium heat.
- Cook for 5–7 minutes until the blueberries are softened and the mixture looks slightly syrupy.
- Blend until smooth, then cool completely to room temperature.
- In a large bowl, whip heavy whipping cream to stiff peaks using a stand mixer.
- Fold in sweetened condensed milk and vanilla extract until no streaks remain.
- Spread one-third of the ice cream mixture into a loaf pan in an even layer.
- Add spoonfuls of strawberry and blueberry sauces over the surface.
- Repeat layers until all of the ice cream mixture and both sauces are used.
- Use a knife to gently swirl the colors into a marble pattern, stopping when ribbons are visible and distinct.
- Cover tightly with a lid or plastic wrap.
- Freeze for at least 6 hours or overnight until firm.
- Scoop and serve straight from the freezer.