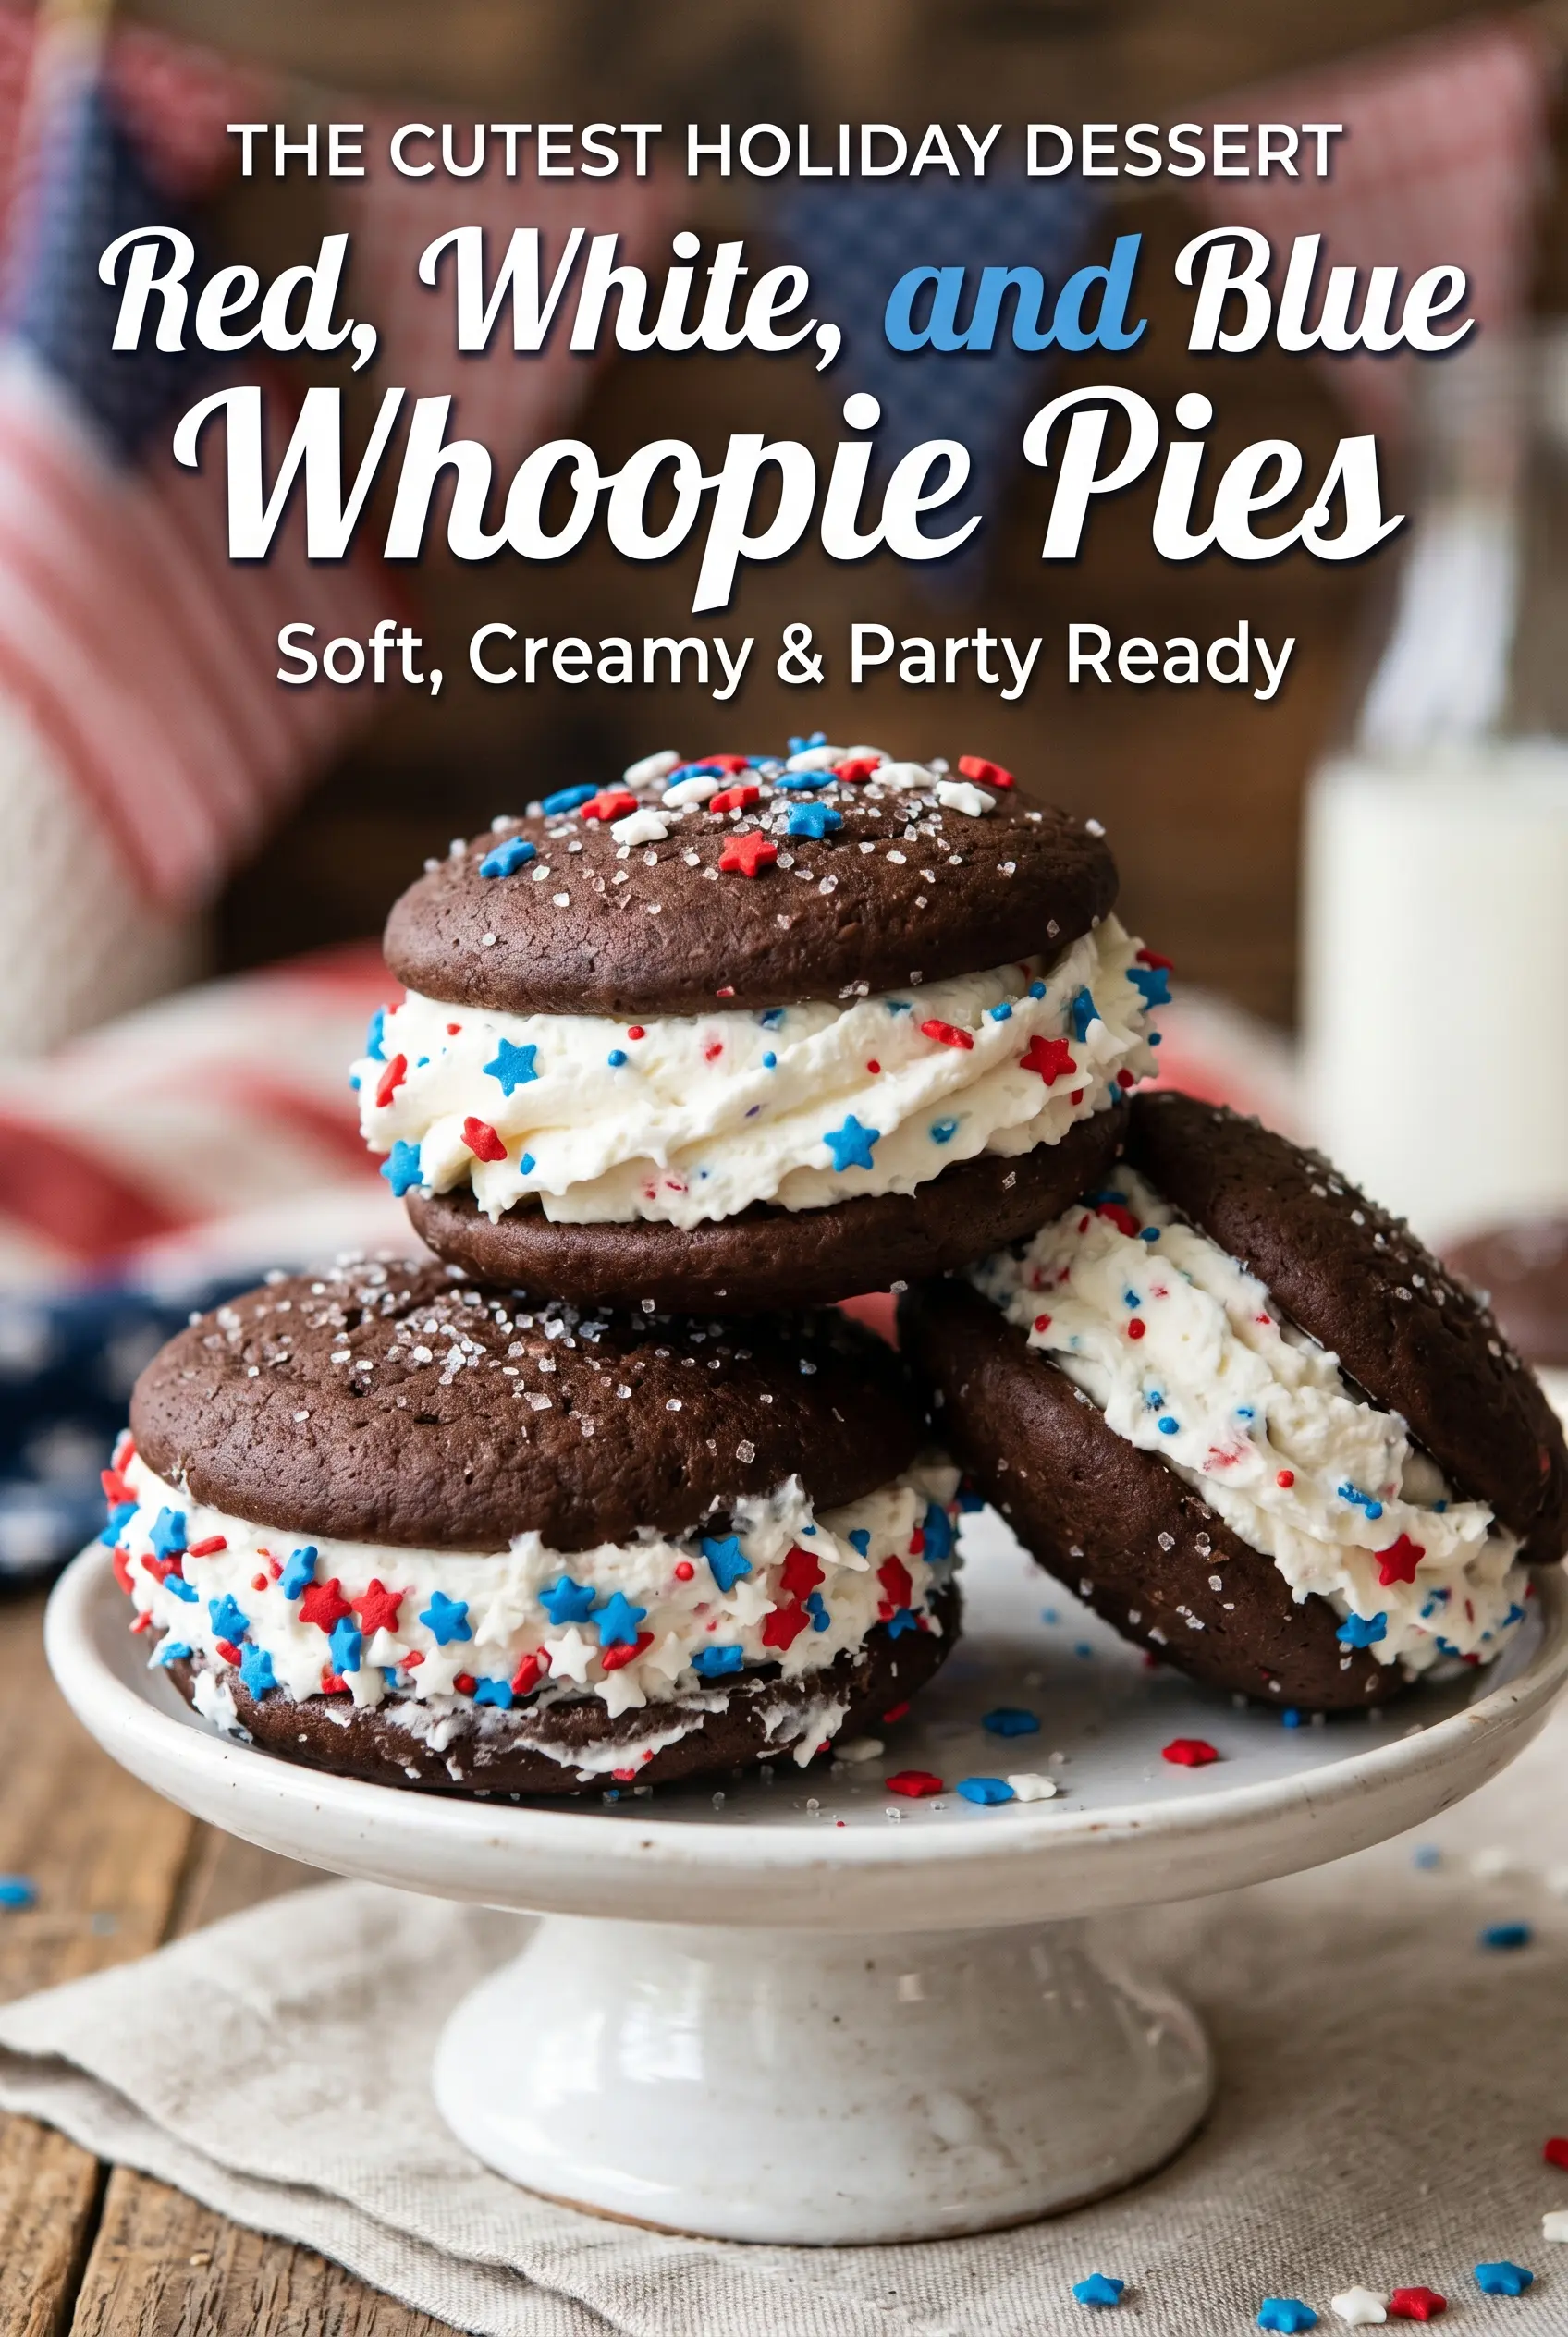
Soft whoopie pie cakes with a fluffy vanilla filling disappear fast because they hit that sweet spot between cookie and cake. The cocoa keeps the cakes tender and gives the red color somewhere to land without tasting like a full chocolate dessert, while the marshmallow-cream filling stays light enough to balance the richness. Rolled in red, white, and blue sugars, they look festive without needing any fussy decorating.
What makes these work is the batter. It should be thick enough to hold its shape when scooped, but still loose enough to spread into those rounded cake tops in the oven. Buttermilk brings a gentle tang and keeps the crumb soft, and the filling uses marshmallow creme instead of just more sugar, which gives it that smooth, fluffy bite that doesn’t turn grainy. Chill them briefly after assembling and the filling sets just enough to keep the sandwiches neat when you pick them up.
If you’ve ever had whoopie pies that baked up dry or filled too heavily, the notes below will help. There’s a specific cue for when the cakes are done, plus a couple of easy swaps if you want to skip the patriotic sanding sugar and keep the filling the star.
The cakes baked up soft and springy, and the filling stayed fluffy instead of squishing out the sides. I chilled them for 15 minutes like you said and they held together perfectly on the platter.
Love the soft chocolate cakes and fluffy vanilla filling? Save these red, white, and blue whoopie pies to Pinterest for your next patriotic dessert table.
The Trick to Whoopie Pies That Stay Soft Instead of Drying Out
Whoopie pies fail when people treat the batter like cookie dough. It shouldn’t be stiff enough to roll and it shouldn’t be thin enough to spread into pancakes. The batter needs enough structure to mound on the tray, then it relaxes in the oven into domed little cakes with a tender crumb.
The other place these go wrong is overbaking. Ten minutes can be enough if your scoops are small or your oven runs hot; if the tops spring back and the centers no longer look wet, pull them. They keep cooking on the sheet for a minute or two, and that carryover heat is enough to turn them from soft to dry if you leave them in too long.
What Each Ingredient Is Actually Doing in This Dish
All-purpose flour gives the cakes enough body to hold the filling without turning dense. Cake flour will make them softer, but the structure gets a little fragile, so all-purpose is the safer choice here.
Cocoa powder deepens the color and gives the cakes a mild chocolate note that keeps the red hue from looking flat. Use unsweetened cocoa, not Dutch-process, unless that is what you have on hand; the texture will still work, but the color may shift a bit.
Buttermilk is doing two jobs: it adds tenderness and helps the baking soda lift the batter. If you don’t have it, stir 1 tablespoon lemon juice or vinegar into a measuring cup and add milk to reach 1 cup, then let it sit for 5 minutes before using.
Marshmallow creme is what keeps the filling fluffy instead of heavy. You can swap in marshmallow fluff in the same amount, but don’t replace it with extra powdered sugar unless you want a stiffer, sweeter filling that loses that soft center.
Softened butter matters in both the cakes and filling. It should dent when pressed, not look oily or melty, because over-soft butter won’t hold air well and the filling can turn loose.
Building the Batter and Filling in the Right Order
Whipping the Butter and Sugar
Beat the butter and granulated sugar until the mixture looks paler and a little fluffy, not just combined. That air gives the cakes a lighter crumb and helps them dome instead of baking flat. If the butter is too cold, the mixture stays gritty and won’t trap much air, so let it soften until it gives slightly under your finger.
Adding the Dry Ingredients and Buttermilk
Alternate the flour mixture and the buttermilk so the batter stays smooth and doesn’t curdle or overmix. Stop as soon as the last streaks of flour disappear; if you keep beating, the cakes can turn tight instead of tender. The finished batter should drop from the spoon in thick ribbons and hold a round shape on the tray.
Baking to the Point of Springiness
Scoop the batter into even rounds so they bake at the same pace. The tops should look set and spring back when lightly touched, but the centers won’t look dry and dark yet. If the edges brown before the centers are ready, your oven is running hot, so start checking a minute or two early.
Mixing the Filling and Assembling
Beat the filling until it looks airy and smooth, scraping the bowl so no butter streaks remain. Pipe or spoon it onto the flat side of one cake, then top with a second cake and press just until the filling reaches the edge. Roll the edges in sanding sugar or sprinkles while the filling is still soft so the decorations stick.
How to Adapt These Without Losing the Soft, Fluffy Center
Gluten-Free Version That Still Holds Its Shape
Use a 1:1 gluten-free baking flour that already contains xanthan gum. The cakes will be a touch more delicate, so let them cool completely before moving them, and don’t overbake or they’ll dry out faster than the original version.
Skip the Food Coloring and Go All-In on the Cocoa
If you want the same soft texture without the red-and-blue look, leave off the sanding sugar and decorations and serve them plain. The cocoa flavor reads a little more clearly without the extra sweetness, and the filling still gives you the classic whoopie pie contrast.
Dairy-Free Swap
Use plant-based butter in both the cakes and filling, then replace the buttermilk with non-dairy milk plus 1 tablespoon vinegar or lemon juice. The cakes stay tender, though the filling may be a little softer, so chill the assembled pies before serving.
Make Them Neater for a Crowd
Pipe the filling with a round tip instead of spreading it with a spoon. You get cleaner edges, more even sandwiches, and less squeezing when the top cake goes on.
Storage and Reheating
- Refrigerator: Store in an airtight container for up to 4 days. The cakes stay soft, though the filling firms up a bit in the fridge.
- Freezer: Freeze assembled whoopie pies wrapped individually, or freeze the baked cakes separately for up to 2 months. The filling freezes, but the texture is best when thawed slowly in the fridge.
- Reheating: These don’t need reheating. Let frozen pies thaw in the refrigerator, then sit at room temperature for 15 to 20 minutes so the filling loses its chill and the cakes taste soft again.
Answers to the Questions Worth Asking
Red, White, and Blue Whoopie Pies
Ingredients
Equipment
Method
- Preheat oven to 350°F (175°C). Set out 2 parchment-lined sheet pans so the rounds can go in right after scooping.
- Line baking sheets with parchment paper. This helps prevent sticking and keeps the cakes from spreading unevenly.
- Whisk all-purpose flour, unsweetened cocoa powder, baking soda, and salt. Whisk until the cocoa and leavening are evenly distributed.
- Beat unsalted butter and granulated sugar until light and fluffy. Continue until the mixture looks paler and slightly airy.
- Add the large egg and vanilla extract. Mix just until smooth, scraping the sides if needed.
- Alternate adding the dry mixture and buttermilk. Start and end with dry, mixing on low only until the batter is cohesive.
- Scoop batter into 2-inch rounds on the prepared baking sheets. Leave space between rounds so they have room to expand.
- Bake for 10–12 minutes. Pull them when the tops spring back lightly and look set, not wet.
- Cool completely. Let the cakes reach room temperature before filling so the cream won’t melt.
- Beat unsalted butter, powdered sugar, marshmallow creme, and vanilla until fluffy. Beat until the filling holds soft peaks and no sugar streaks remain.
- Pipe filling onto half of the cakes. Use a steady pressure so the filling forms an even layer.
- Top with remaining cakes to form sandwiches. Press gently so the filling spreads slightly to the edges.
- Roll edges in patriotic sprinkles and colored sugars. Coat the outer rim evenly for the red, white, and blue look.
- Chill for 15 minutes before serving. This firms the filling for cleaner bites and better slice-and-serve shape.